Setting up markdown-oxide to better integrate Neovim with Obsidian
What do you do if you are a huge fan of Obsidian, but want to use a text editor instead of the application interface? By operating in the terminal you will lose some of the quality of life features, particularly autocomplete for references and tags that Obsidian brings to the table. markdown-oxide is a plugin that adds a handy LSP into your configuration to enable these lost features.
This tool requires the usage of a few prerequisites, notably the setup of LSPs and completions. I would recommend making sure you have those setup and configured first. Take a look here for a guide to get nvim-lsp up and running. See this blog post for a quick introduction to completions. If you prefer to learn by inspecting, feel free to look at how I have done it.
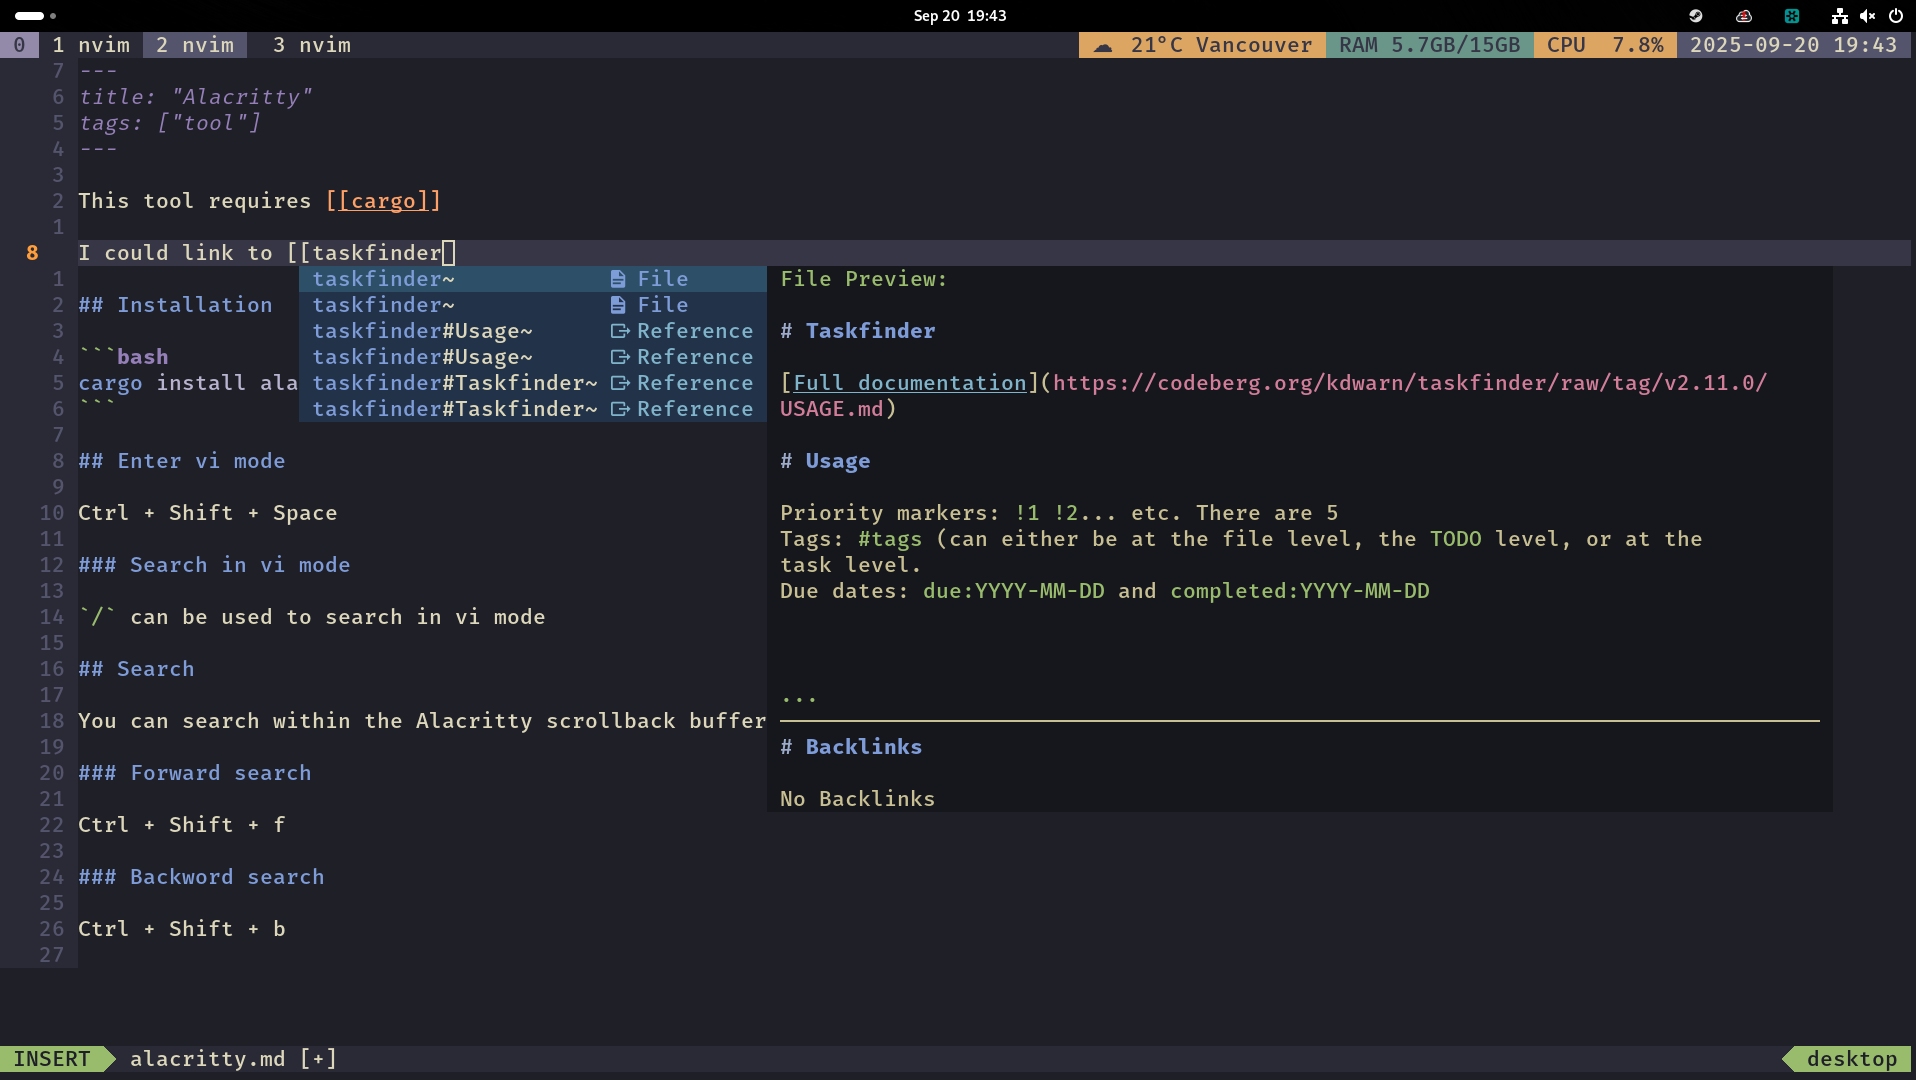
Here is a preview of what it looks like in practice. This post was written using markdown-oxide version 0.25.8.
Installation
First, you need to ensure that the binary is installed on the system. I would recommend doing this with cargo. You can also install via mason.nvim if you have that available. markdown-oxide is under the LSP section.
cargo install --locked --git https://github.com/Feel-ix-343/markdown-oxide.git markdown-oxideNext, you need to modify your neovim configuration for the plugin. The following will need to be added to your lsp configuration:
local capabilities = require("cmp_nvim_lsp").default_capabilities(vim.lsp.protocol.make_client_capabilities())

require("lspconfig").markdown_oxide.setup({
    capabilities = vim.tbl_deep_extend(
        'force',
        capabilities,
        {
            workspace = {
                didChangeWatchedFiles = {
                    dynamicRegistration = true,
                },
            },
        }
    ),
    on_attach = on_attach
})
In the nvim-cmp settings, add the following to the sources section:
{
name = 'nvim_lsp',
  option = {
    markdown_oxide = {
      keyword_pattern = [[\(\k\| \|\/\|#\)\+]]
    }
  }
},
Great, now you should be all setup to start using it[1]. I’ll cover the basics that you might want to try right out of the gate if you are going to integrate this with Obsidian (also useful even if you are running a pure Neovim pkm system!).
Usage
If any of the gifs are difficult to see, right clicking and opening them in a new tab will make them much easier to see!
Follow a reference link
The first thing you will want to do is learn how to follow links within your notes. By default, this uses the key to “Go to definition” (most likely gd while hovering over the link.) You will also notice that we get a handy little blue info indicator saying that we have created a reference without a page! This is also why [[rustup]] is grey on the cargo.md page.
Use tags
Tags will auto complete whenever you type #. Cycle between the options with Ctrl + j and Ctrl + k, then Enter to select.
Use Obsidian style callouts
Type > and there will be all of the syntax options for Obsidian style callouts presented.
Configuring daily notes
I keep all of my daily notes in a dedicated directory called journal. If you also keep your daily notes separate, you will first have to tell markdown-oxide which directory it should use for daily notes.
It is very important to use the absolute path. Do not use ~.
# ~/.config/moxide/settings.toml
daily_notes_folder = "/home/mark/wiki/journal"
After this configuration, you can use :Today from anywhere to quickly open the daily note. You can also change the formatting for how these files are named. If you are importing an existing vault, leave this setting blank.
# ~/.config/moxide/settings.toml
dailynote = "%Y-%m-%d"
The last configuration option that I would suggest setting is telling markdown-oxide where to place new files by default.
# ~/.config/moxide/settings.toml
new_file_folder_path = "/home/mark/wiki"
Conclusion
If you have any questions or run into any difficulties when setting this up, give me a shout!. I might be able to help!